Sunday, October 20, 2013

Pin and Pair

Introducing a new tradition on my social media (Facebook and Instagram).....


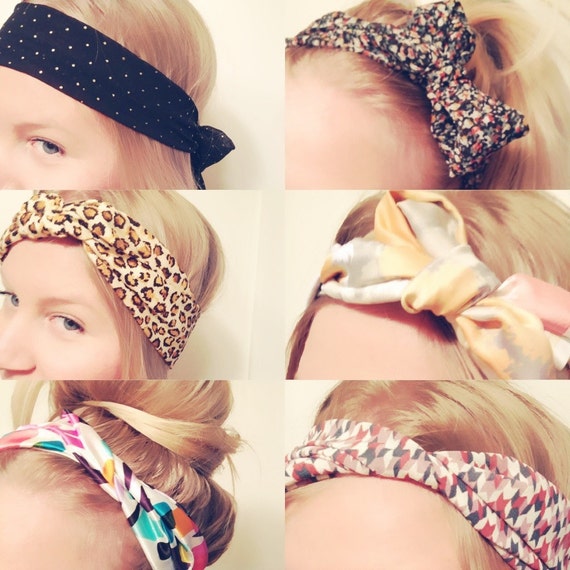
Recently I have been loving all the pretty pins on hairstyles on Pinterest! Being a hair accessory creating kind of gal- I find that you can incorporate a ton of different styles, lengths, shades and textures of hair with some flhair. I have paired some lovely and price perfect hair accessories from my shop and currently some fav pins on Pinterest - love the short dark pixie with a simple, sparkly headband!!! Total hair envy right thur <3 I hope you enjoy and let me know what you think. Christmas is just around the corner and these pretties make the perfect gift or stocking stuffer! Did I mention the hair ties ship perfectly in the mail (for birthdays, get well, congratulations and more)? Love how you can just sneak them in a card and mail it out! I just mailed these for my niece's birthday <3 so cute and she absolutely loved them! 


Sunday, September 22, 2013

Butternut Sweet Potato Squash Ravioli and Turkey Bacon

So since it is the first day of fall, I thought I would share a quick post on my fiancé's fav fall meal.... Butternut Squash Ravioli with Sweet Potatoes and Turkey Bacon (I always add in pecans but due to his but allergy I omit them).  


Ingredients: (6 servings)
Two scoops of Ghee (you can also use butter)
1 package of premise butternut squash ravioli (I got mine at Safeway)
1/2 package of turkey bacon (also from Safeway)
2 sweet potatoes (diced - I used one white and one orange)
A spoonful of Raw Sugar
A pinch of Cinnamon
A pinch of Black Pepper
A pinch of Italian Seasoning 
A pinch of Cumin

Directions:
Heat one large skillet in med high heat add in the butter, seasonings and sugar. Brown up the butter and add in your turkey bacon (in small pieces). 
In separate pot bring water to boil and throw in your sweet potatoes. Continue to boil. 
Once your turkey bacon is crisp remove from heat. Fork test your sweet potatoes. If they fall off the fork when you stab them - they are ready. Throw in your ravioli and continue to boil until the ravioli pieces float to the top. 
Strain the sweet potatoes and ravioli and place into pan with butter and bacon. I cook them until the potatoes and ravioli are starting to crisp up. Remove from heat and place two ravioli pieces on a plate with a bit of sweet potato and turkey bacon on top. They are very filling. I served this with a light onion, apple spinach salad (1/2 my plate) with some pecans sprinkled over the pasta and salad. I served a light dressing. 

Now this isn't the most healthy of meals BUT it is good and if its just the two of you- you'll have leftovers to boot! Woo-Hoo! And the leftovers are GOOD! 

What are your fall favorite recipes? 

Hope you enjoy <3 

Sunday, August 4, 2013

Sunday Challenge! Shabby to Chic Vintage Makeover and DIY Chalk Paint Recipe


So I had a moment at the junk store and bought this bad boy for little to nothing. It was wobbly, tarnished and was missing pieces. My fiancé thought I was CRAZY when I said I wanted to fix it up. He offered to pay for a furniture piece that I would love and didn't need a miracle but I saw the potential in this little guy. So after the gal rang me up, he was mine! I loaded him into the car and drove him home. He sat in my garage for a few weeks. My fiancé was cleaning out the garage and asked if I wanted to toss it. That is when I decided to take things into action, reserve a day to finish it (today) and complete the challenge.

Now my mom is amazing at repurposing and selling vintage furniture as well as her  business partner, Sandy. In fact they have their own stores as well as an amazing Vintage Show called Wild Women's Vintage in Spokane, Wa! I had some direction and guidance from my mom but being 3 1/2 hours away from there I thought I'd just give it a go on my own.

Here's the Before and After:


I purchased my own ingredients to make chalkpaint for a fraction of the cost for the Annie Sloan kind (which is absolutely amazing but being in a small town far away from a retailer I had to make due!). 
I bought sand less grout, primer+paint (all -in-one) behr custom colored some cheap brushes, sandpaper, a large bucket and trewax (a soft furniture wax to seal in the color as well as protect the paint from water, dings and dents). 

In case you are wondering. Here's how to make your own chalk paint:

2 Cups Behr Primer + Paint Flat Paint in the color of your choice
1 Cup Sand Less Grout
1 Cup Water

Step 1: In a large bucket, mix 1 cup water and 1 cup sand less grout. 

Step 2:Mix until smooth. 

Step 3: Add in your 2 cups paint and mix together.

Step 4: Paint! 

Here's the after photo with detail shot as well....


I sanded off some of the paint to make it smooth and sanded the edges to give it a shabby chic vintage look and applied my wax over the top. 

I don't know about all of you but it felt really good to push myself doing something new and creative! I was tired, hot (100 degrees today!) and there were times I wanted to give up but I am happy I didn't. I even finished a few other pieces to sell at the vintage show coming up. I hope this inspires others to push themselves as well and encourage others to do some shabby to chic adventures as well! Try it, you just might love the end result like me! 


Monday, July 29, 2013

How To: DIY Mini Floral Bun Cover Wrap


Hello! I am sorry I have been so neglecting on my blog! Lots of new items and orders in my shop, so I haven't been able to get new posts up BUT I hope this little DIY will make up for some of it!


So with all the lovely gals out there that are rocking these adorable floral "mini crown" bun covers for those beautiful top knots, I thought I would make a quick tutorial so you can see how these are done! I also have them available in the shop for purchase as well (in case you are not wanting to be so crafty).


All you will need to get started are some small silk flowers (I buy mine at hobby lobby - they have the prettiest silk ones ev-ah!). Also you will need scissors, a hair tie and a glue gun. So let's get started!


Take the back plastic holding the flower together and snip off the end with the scissors. Make sure to leave just a tid bit of plastic. Using your glue gun make a pea-size dot over the plastic and on the flower and place on the center of the hair tie. Make sure your glue is not too hot or it can burn your skin and ain't nobody got time for dat!
 
 
Make sure it is centered for your bun. I am using five flowers and glued the largest one in the middle and will layer on the smaller ones at the end. You can use however many you would like but make sure there is still elastic so you can have it stretch.
 
 
To secure the back of the flower place a pea-sized dab in the back and place the green "leaf" piece to the back of the hair tie and press firmly to secure. Now do the same for the other four flowers.
 
 
The front should end up like this. I placed my flowers pretty close together so they are more floral-y if that even makes sense.
 
 
Here is what the final product looks like in a messy top knot. Easy and inexpensive little DIY! If there is anything you would like to see in DIY form please feel free to comment below. I would love to do more of these! I think they would make great gifts for your friends as well! And with an array of pretty colors - I am looking at doing some in a pretty plum or burgundy for fall and winter.


Wednesday, April 17, 2013

Fl(h)air Headscarf Giveaway over at Love me, Danie Marie!

Fl(h)air Giveaway on our NEW Headscarves over at Love me, Dani Marie's Blog:


I am so excited to have the lovely and very fashionable blogger Dani, from lovemedaniemarie.com, model the new Fl(h)air Accessories Headscarves! I love to wear mine with a top knot or a messy bun since these days I am always on the GO becasue they are effortlessly chic even when you are coming back from the gym! I love how adorable Miss Dani is wearing hers! Seriously ya'll these are so easy to wear and there are so many ways to wear them! Dani is rocking the looks - Which one is your favorite?

Enter your chance to WIN one of these adorable headscarves here

Best of luck to all the contestants! If you are wanting to get your own, there are lots of designs in my shop on Etsy as well!! Here are a few more ways for you to wear and other design colors! Love the black floral print one - so cute with all colors!

Lovely Thin Headscarf Many Ways To Wear Vintage Floral Flower Pink Blue Print Bow Turban Easy DOLLAR SHIPPING in US

Wednesday, March 13, 2013

Spring Essentials - Stripes


Now that the weather is getting warmer by the day and day light savings has come once again, it's time for spring essentials and favorites!

Today is all about stripes! Super basic and as you can see a basic black and white stripe tee doesn't have to be anything too trendy! I paired my stripe 3/4 length shirt tucked into a black floor length maxi with nude flats and a bit of coral punch color accessories and lipstick for some spring flair.

Don't be afraid if you are a bit more curvy (like myself) to add in stripes to your spring outfits. Make sure to look slim, yes even with stripes, if you keep the stripe smaller and more fitting up top with a basic (I love my black clothes) solid color on bottom. Also if you are petite to wear your heels and your skirts up a little higher on the waistline to make the appearance of longer legs and add to your overall height.

I love to keep most of my clothes pretty basic with trendy accessories like this custom set from my Fl(h)air line (emmaflhair.etsy.com) to add more color and glam to my outfits without breaking the bank on a super trendy piece.


Clothing worn: maxi skirt (thrifted), 3/4 length stripes shirt (Macy's), nude flats (Francesca's - Palm Springs), maybelline lipstick (coral crush), accessories (flhair)


Friday, March 1, 2013

Health Benefits of Lemon and Warm Water

It's a little secret that I have come across that has made a big difference in my health. I have started the mornings with a cup if warm water and lemon. I still have my coffee and continue on with my daily routine- could never give that up! But I am slowly converting to better health. Nothing drastic, just baby steps in the right direction.

I have noticed a change in all the things listed and wanted to share them with you as well. Usually I post a fun baking or cooking recipe but today this just felt like it should be shared <3 you can use limes lemons - whatever you prefer!

I jotted down a few notes (handwritten) from what I found on the Internet, what my doctor has told me and from a few inspiring health articles I have read. I hope you enjoy!